
Overlooking wood floor quality is one of the most expensive mistakes a property owner can make. A floor that looks fine on the surface can harbour hidden moisture damage, poor installation, or structural problems that quietly worsen for months before they become impossible to ignore. In Glasgow’s damp, variable climate, these risks are amplified. This guide gives you a practical, step-by-step approach to assessing your wood floor like a professional, helping you catch problems early, protect your property value, and make informed decisions about repairs or replacement.
Key Takeaways
| Point | Details |
|---|---|
| Start with the right tools | Simple gear and a checklist provide a reliable quality overview. |
| Dive deeper than surface checks | Hidden issues often require moisture readings and professional standards-based inspection. |
| Know when to consult an expert | Certified inspectors prevent costly mistakes and offer documented findings for insurance or resale. |
| Glasgow conditions require special care | Humidity can hide faults, so thorough local experience is critical. |
What you need before you begin
Before you start inspecting anything, it helps to know what you are actually looking for and what simple tools will make your checks more reliable. A thorough assessment covers four core areas: the visible surface, moisture levels, individual board condition, and the overall quality of the installation.
Here is a basic toolkit that will serve you well:
- Moisture meter (pin-type or pinless): measures moisture content in the boards
- Torch or inspection light: reveals surface scratches, finish irregularities, and low spots
- Straight edge or spirit level: checks for flatness and cupping across boards
- Notepad or phone: for photographing and documenting findings
- Knee pads: useful for close-up inspection along skirting boards and transitions
Glasgow’s climate presents specific challenges that make these tools especially important. The city sits in one of the wetter regions of the UK, and indoor humidity can swing considerably between seasons. These fluctuations cause wood to expand and contract, and recognised industry guidance makes clear that benchmark standards and professional competence require objective data, not guesswork.
| Assessment area | What to look for | Tool needed |
|---|---|---|
| Surface condition | Scratches, discolouration, finish wear | Torch |
| Moisture content | Readings above 12% warrant further checks | Moisture meter |
| Board flatness | Cupping, crowning, or raised edges | Straight edge |
| Installation quality | Gaps, squeaks, loose boards | Eye and foot test |
Pro Tip: Always inspect floors in natural daylight where possible. Artificial lighting, especially overhead spotlights, can mask surface unevenness and mislead your visual check completely.
Being aware of wood flooring errors to avoid before you begin will sharpen your eye for warning signs that first-time assessors often miss. If you are unsure at any stage, a certified inspector can be engaged to provide documented findings.
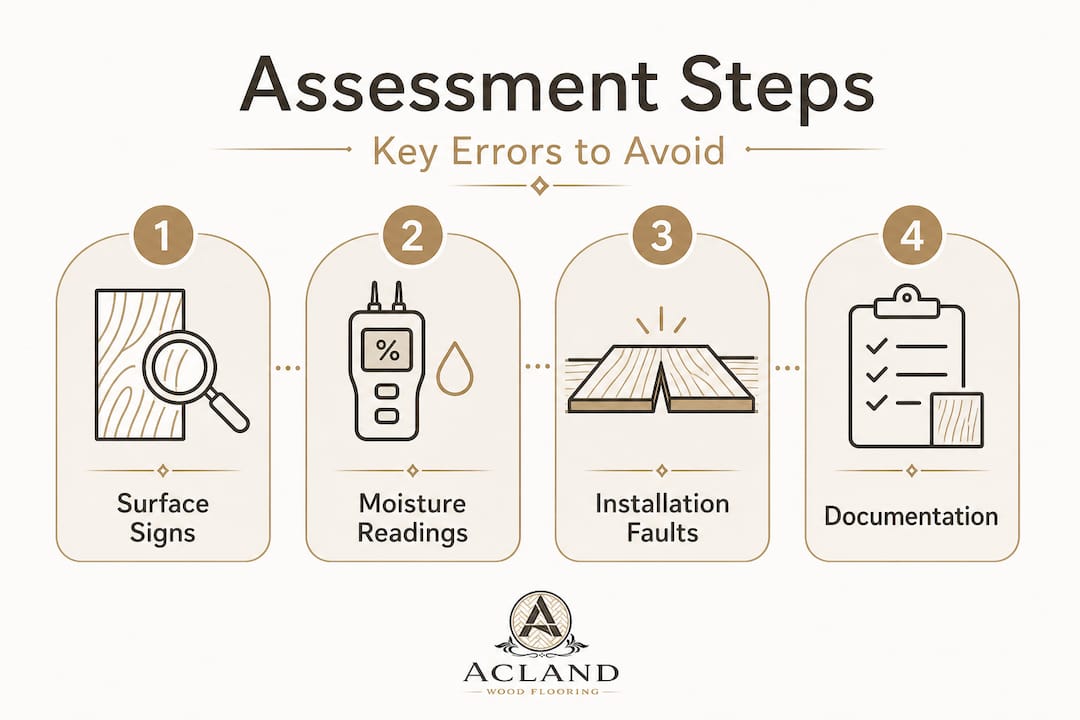
Step-by-step: How to assess wood floor quality
With your tools and a plan in place, you can now begin assessing your wood floor step by step.
Start with a full visual sweep. Walk the entire floor in good light, looking for discolouration, uneven staining, scratches, or areas where the finish has worn through. Pay close attention to high-traffic zones near doorways and hallways, where wear shows first.
Check surface flatness. Lay your straight edge across multiple boards in different directions. Any gap greater than 3mm under a 1.8-metre straight edge suggests cupping or swelling, which often points to a moisture problem. Recognised standards and data are vital when making this assessment accurately.
Test for bounce and soft spots. Walk slowly across the floor, shifting your weight deliberately. A slight bounce underfoot suggests inadequate subfloor support or a floating installation that has not adhered correctly. Soft spots may indicate rot or subfloor failure.
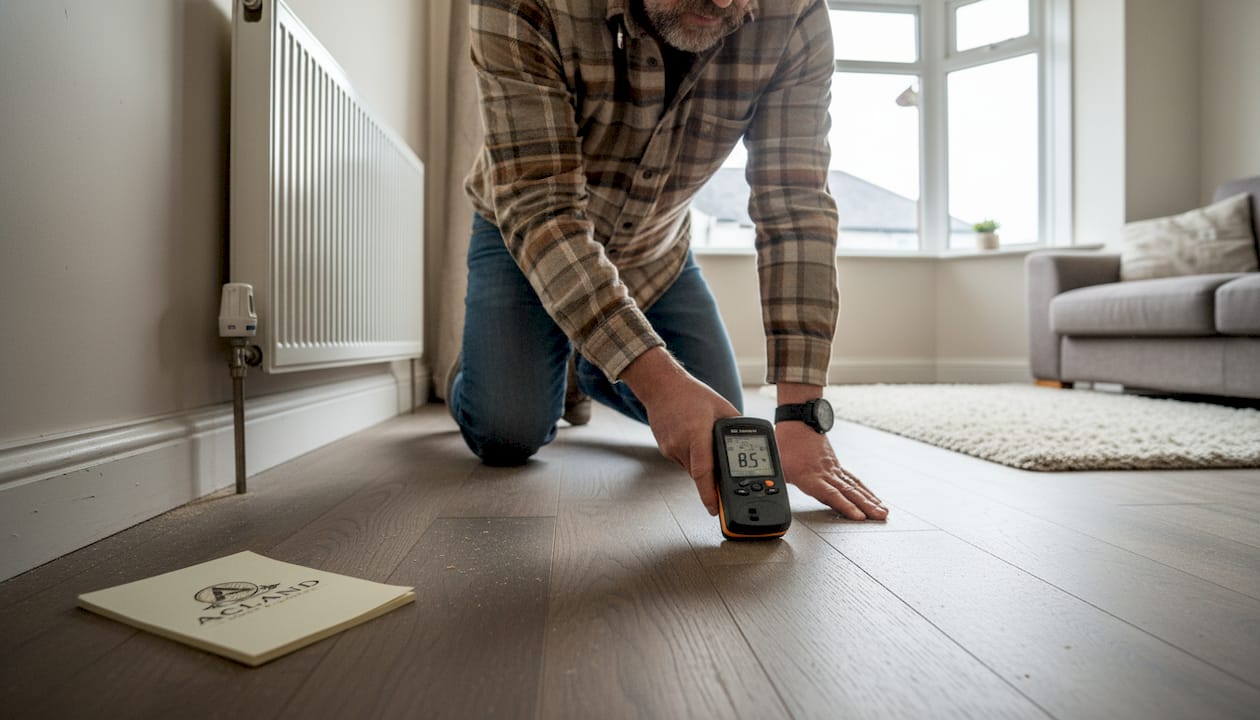
Take moisture readings. Use your moisture meter on multiple boards across the room, including near external walls and under windows. Normal moisture content for installed wood flooring sits between 6% and 12%. Readings outside this range deserve attention.
Inspect board edges and gaps. Kneel down and look along the floor at a low angle. Gaps between boards can be seasonal and minor, but wide or uneven gaps suggest the floor was not properly acclimatised before installation. Learn more about what proper wood floor installation should look like to compare against what you are seeing.
Listen as you walk. Squeaking or creaking in isolated spots usually points to loose fixings or boards rubbing together. Widespread noise across an area can signal a broader installation failure or subfloor movement.
“Surface moisture checks can miss trapped moisture; deeper readings are needed if symptoms suggest hidden issues.” Moisture Detection Techniques for Hardwood Floors
This is especially relevant for solid wood flooring, which responds more dramatically to moisture changes than engineered alternatives. Solid wood can cup or bow noticeably when moisture is trapped beneath it, even if the surface looks acceptable at first glance.
Pro Tip: If your moisture meter reading seems inconsistent with what you see, take readings at several depths by drilling a small test hole (in a concealed area) and inserting a pin probe. Trapped subfloor moisture is one of the most frequently missed issues in amateur assessments.
Common problems to watch for
Having followed the core steps, these common problems can surface during your assessment and require special attention.
The table below summarises the most frequently seen faults and what they typically signal:
| Problem | Likely cause | Urgency |
|---|---|---|
| Cupping (edges raised) | Excess moisture from below | High |
| Crowning (centre raised) | Moisture from above or over-sanding | Medium |
| Squeaking boards | Loose fixings or subfloor movement | Medium |
| Persistent damp odour | Mould or trapped moisture | Urgent |
| Gaps between boards | Poor acclimatisation or low humidity | Low to medium |
| Soft or spongy feel | Subfloor rot or structural failure | Urgent |
Watch specifically for these warning signs that demand urgent professional involvement:
- Visible mould on or around boards, even in small patches
- Systemic gaps running across most of the floor rather than isolated spots
- Staining or dark patches beneath boards visible at edges
- Buckling or lifting boards that have physically separated from the subfloor
When moisture or installation failures are suspected, certified inspectors should always be sought to assess and document the problem properly. For properties in Glasgow, choosing flooring suited to humid climates from the outset can prevent many of these issues entirely.
Documenting everything you find is essential. Take clear photographs with a timestamp, note the location of each issue on a rough floor plan, and record your moisture meter readings. This evidence becomes invaluable if you need to escalate to a professional or make an insurance claim.
Confirming your findings: When to go pro
If problems persist or there is any uncertainty, confirm your assessment by involving a certified professional.
Follow these steps to move from initial assessment to professional confirmation:
Gather all your evidence. Compile your photographs, notes, and moisture readings into a clear summary. Include the date, location of each issue, and any recent changes such as new heating, plumbing work, or weather events.
Contact a certified inspector. Look for inspectors with recognised credentials, ideally those trained to industry standards who use documented, measurable criteria. Ask specifically for a written report that includes measured data, not just opinions.
Understand what the report covers. A proper professional inspection will include moisture content readings at multiple depths, photographic evidence, assessment against installation standards, and written recommendations with clear remediation options.
Use the report strategically. A certified report is not just useful for repairs. It can support boosting your property value before a sale, substantiate an insurance claim, or resolve a dispute with a contractor. The written evidence carries far more weight than informal observations.
Pro Tip: Before engaging any professional, ask whether they carry professional indemnity insurance and whether their reports are accepted by insurers. Not all inspectors operate to the same standard, and the quality of their documentation matters as much as their findings.
Understanding why expert advice matters becomes very clear at this stage. The difference between a qualified specialist and a generalist can be the difference between catching a serious fault early and discovering it after significant damage has already occurred.
Why quick checks aren’t enough: Our expert view
Here is something most guides will not tell you plainly: even careful, well-intentioned homeowners regularly miss the faults that cost the most to fix.
In our experience, the pattern is consistent. A homeowner notices a slight squeak or a small gap. They press on the boards, take a surface moisture reading that comes back within normal range, and decide the floor is fine. Six months later, the cupping is severe and the subfloor has started to deteriorate. The problem was never on the surface. It was trapped moisture reading as normal because the pin probe barely reached past the finish layer.
Glasgow’s climate makes this worse than it would be elsewhere. Humidity here is not just a seasonal issue. It is a year-round variable that shifts with heating cycles, rainfall patterns, and how well individual properties are ventilated. A floor installed correctly in July can behave very differently by February.
The uncomfortable truth is that surface checks are a starting point, not a conclusion. Without deeper moisture readings, understanding of subfloor conditions, and knowledge of installation standards, a visual inspection gives you confidence you may not have earned. The real benefits of professional installation go beyond the fitting itself. A professional who knows the local climate, the materials, and the installation standards will spot in ten minutes what a homeowner might miss entirely.
We have seen cases where a floor passed every visible test and was declared acceptable, only for the boards to begin lifting a season later once trapped moisture finally expanded under thermal pressure. These failures are not random. They are predictable if you know what to look for at depth.
Tailored wood floor guidance for your property
Assessing your floor is an excellent first step, but knowing what to do with what you find is where real expertise makes a difference.

At Acland Wood Flooring, we work specifically with Glasgow homeowners and property managers who want honest, knowledgeable advice suited to Scotland’s climate. Whether you are evaluating an existing floor or considering a new installation, we can help you understand your options clearly. Browse our guides on modern wood floor solutions and humid climate flooring options for practical, locally relevant guidance. Commercial property owners will also find detailed support through our commercial flooring advice. Get in touch and let us help you make a confident, well-informed decision.
Frequently asked questions
How do I quickly check for hidden wood floor moisture?
Start with a surface moisture meter, but if readings do not match visible symptoms, a deeper invasive inspection is needed. Surface readings can miss hidden moisture trapped beneath boards, making deeper checks essential when problems persist.
What are accepted standards for wood floor quality?
Quality is assessed using measurable data, written findings, and recognised industry guidance applied by certified professionals rather than informal visual checks alone.
Should I assess wood floor quality myself or call an inspector?
Initial checks are a sensible starting point, but certified professionals provide the documented evidence needed for serious faults, resale purposes, or insurance claims.
What’s the most common mistake homeowners make?
Relying solely on surface observations and overlooking deeper moisture issues is the most frequent error. Non-invasive readings miss moisture that is trapped beneath boards where standard meters cannot reach.
Can a poor-quality wood floor reduce property value?
Yes. Visible faults, untreated moisture damage, or poor installation can lower resale value noticeably and complicate insurance claims if documentation of the condition is not available.