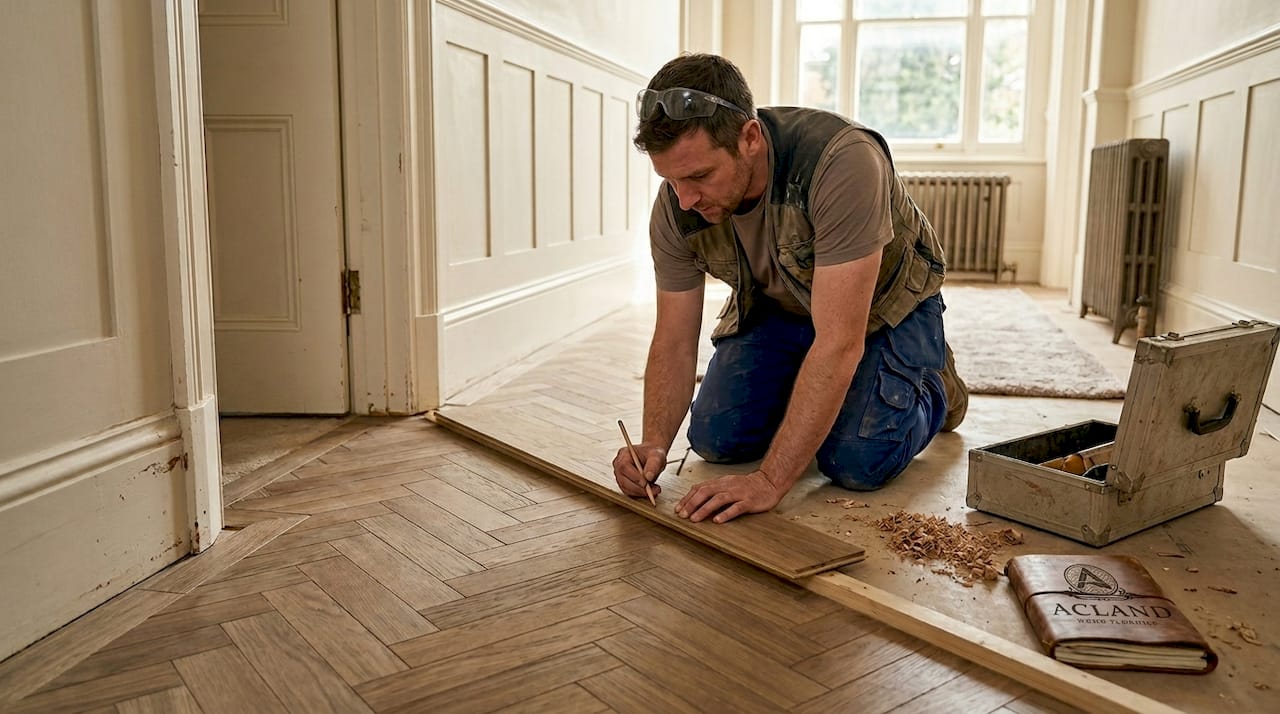
Herringbone flooring is one of the most visually striking patterns you can choose for a Glasgow home, but it is also one of the most demanding to install correctly. Unlike a straightforward plank layout, herringbone requires every board to sit at a precise 45-degree angle, and even the smallest miscalculation at the start can ripple across an entire room. The good news is that with the right workflow, the right materials, and a clear understanding of each stage, you can achieve a result that looks genuinely spectacular and lasts for decades. This guide walks you through every step.
Key Takeaways
| Point | Details |
|---|---|
| Preparation is essential | A perfectly level subfloor and quality materials prevent costly mistakes in herringbone layouts. |
| Dry-lay reveals problems | Test-fitting boards before fixing exposes potential alignment errors and helps avoid pattern drift. |
| Precision stops drift | Meticulous measurement and cutting are crucial to maintaining herringbone pattern consistency. |
| Final checks matter | A thorough inspection ensures the installation meets the highest standards before finishing. |
Preparation and choosing materials
Good preparation is not optional with herringbone. It is the single biggest factor separating a floor that looks professionally installed from one that looks slightly off. Before a single board touches the ground, your subfloor needs to be clean, dry, level, and structurally sound.
Herringbone amplifies subfloor imperfections and alignment errors far more than a straight lay pattern does, which is why subfloor preparation for herringbone deserves serious attention before anything else. A slight dip or ridge that you might barely notice under a plank floor becomes glaringly obvious when boards are laid at opposing 45-degree angles. The pattern draws the eye along diagonal lines, making any unevenness impossible to ignore.
For Glasgow and Central Scotland homes, moisture is a particular concern. Scotland’s climate means subfloors can carry higher moisture levels, especially in older tenements or ground-floor flats. Always check moisture content with a calibrated meter before proceeding. Engineered wood is generally more dimensionally stable than solid wood in these conditions, making it a popular and sensible choice for many local properties.
Here is a quick comparison of common material options:
| Material | Stability in Scottish climate | Best use case | Relative cost |
|---|---|---|---|
| Engineered oak | Excellent | Most rooms including ground floor | Moderate to high |
| Solid oak | Good with preparation | Upper floors, well-ventilated rooms | High |
| Solid walnut | Good | Feature rooms, low humidity | High |
| Engineered walnut | Excellent | Any floor level | Moderate to high |
Key materials and tools you will need:
- Moisture meter and straightedge for subfloor assessment
- Flexible wood flooring adhesive suitable for Scotland’s humidity levels
- Acoustic underlay (where adhesive method is not used)
- Mitre saw for precise 45-degree cuts
- Tapping block and rubber mallet
- Spacers for expansion gaps
Avoid the common wood floor preparation pitfalls that catch many homeowners out, particularly skipping the acclimatisation stage. Boards should sit in the room for at least 48 to 72 hours before installation, allowing them to adjust to the room’s temperature and humidity.
Pro Tip: Run a long straightedge across your subfloor in multiple directions before you start. Any gap greater than 3mm over a 1.8-metre span needs levelling compound before you proceed. This one step alone can prevent hours of frustration later.
Dry-lay and marking the starting line
Once you have gathered your tools and materials, you are ready to map out your herringbone pattern. This stage is where precision pays off most visibly.
Dry-laying means placing boards across the floor without adhesive or fixings, purely to test the pattern, check the fit, and identify any issues before you commit. It sounds like an extra step, but it saves significant time and material. A dry-lay first lets you test the pattern, spot potential drift, and plan your perimeter cuts before anything is fixed in place.
Follow these steps to mark your starting line accurately:
- Find the centre of the room by measuring both the length and width, then snapping chalk lines from the midpoints of opposite walls.
- Where the chalk lines cross is your centre point. This is where your first board will be positioned.
- From the centre point, use a large set square to draw a line at exactly 45 degrees to the walls. This becomes your primary reference line.
- Fix a straight timber batten along this reference line using temporary fixings. The batten acts as a physical guide and prevents your first rows from shifting.
- Lay several rows of boards dry along the batten, checking that the pattern reads correctly from the room’s main entrance.
Important: Measurement accuracy at this stage is not something to rush. An error of even 2mm in your starting line will compound across the room, causing visible misalignment by the time you reach the walls. Take your time here.
Explore herringbone pattern design tips if you are still deciding on board dimensions or the direction of the pattern relative to your room’s focal point. The direction you choose affects how the room feels visually, with boards running towards a window or fireplace typically creating the most pleasing result.
Cutting, laying and avoiding drift
With your pattern marked and stable, you are ready to start cutting and laying boards in earnest. This is the most time-intensive stage, and maintaining focus on alignment throughout is essential.
Begin laying from your batten outward, working in small sections rather than trying to cover large areas at once. Apply adhesive in manageable sections, typically around one square metre at a time, to prevent it from skinning over before boards are placed. Use mitre saw tips for flooring to ensure your perimeter cuts are clean and accurate, as rough edges at the walls will show even under skirting boards if they are significant.
For obstacles such as door frames, radiator pipes, and hearths, mark each board individually before cutting rather than relying on a single measurement. Rooms are rarely perfectly square, and individual marking prevents cumulative errors.
Signs of misalignment to watch for as you lay:
- Gaps widening or narrowing between boards in the same row
- Diagonal lines appearing to curve rather than running straight across the room
- Board ends not aligning at the joints between alternating pieces
- Pattern looking compressed or stretched in one direction
If you spot any of these signs, stop and investigate before continuing. Laying more boards over a misaligned section makes correction far more difficult and costly.
Here is a realistic time estimate for each workflow stage in an average-sized room of around 20 square metres:
| Stage | Estimated time |
|---|---|
| Subfloor preparation | 3 to 5 hours |
| Dry-lay and marking | 2 to 3 hours |
| Cutting and laying boards | 8 to 12 hours |
| Final inspection and finishing | 2 to 3 hours |
Note that herringbone takes roughly 30% longer than a straight lay pattern overall. For a classic herringbone workflow, patience at each stage is what separates a good result from a great one.
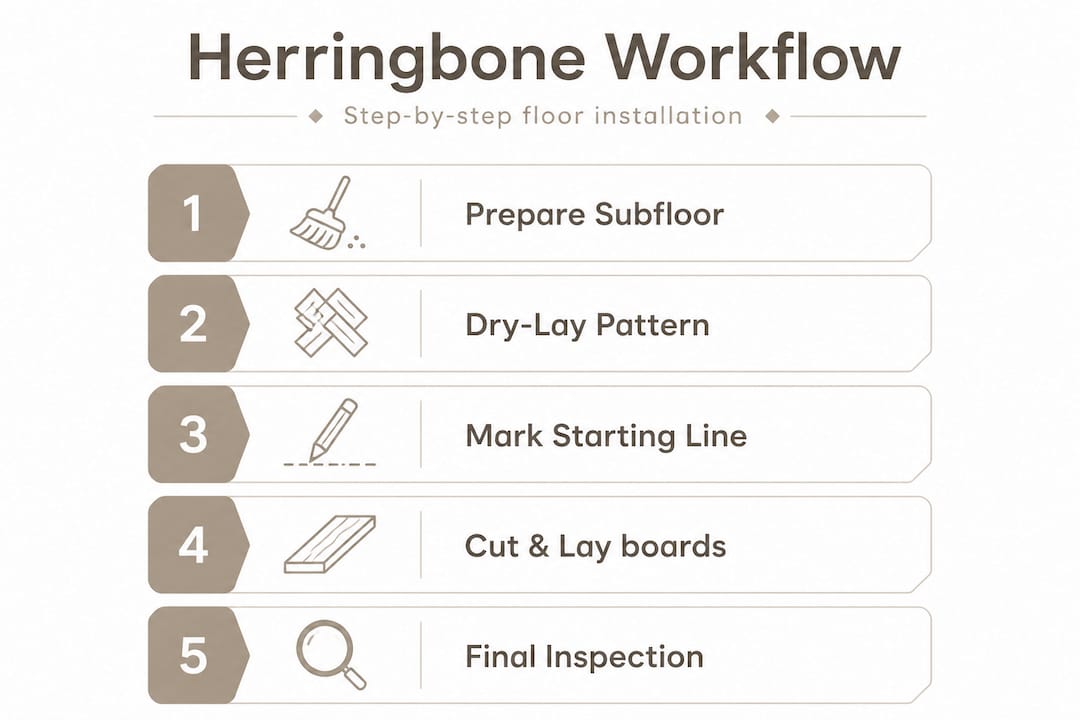
Final inspection and troubleshooting
After boards are in place, a careful inspection ensures lasting quality and visual appeal. Do not skip this stage simply because the floor looks good from a standing position. Get down to floor level and look along the diagonal lines from multiple angles.
Follow this inspection sequence:
- Check all board joints are tight with no visible gaps along the length of each board.
- Look along each diagonal row to confirm they run in straight lines across the full width of the room.
- Inspect perimeter cuts to ensure expansion gaps are consistent, typically 10 to 12mm, around all walls and fixed objects.
- Press gently on boards in several locations to check for any hollow spots indicating poor adhesive contact.
- Confirm that the pattern reads correctly from the room’s main entrance point.
Pro Tip: Place a long straightedge across multiple board rows at various points in the room. Any rocking or gaps beneath the straightedge indicate a subfloor issue or a board that has not bonded correctly. Address these before applying any finishing treatment.
If you find misalignment that is more than cosmetic, it is worth knowing when to call in professional help. As professional installation is recommended for herringbone due to the precision demands, catching problems early and seeking expert advice can save the cost of replacing boards that have been incorrectly laid.
What professionals know: beyond the standard workflow
Here is something the standard guides rarely say plainly: herringbone flooring is genuinely difficult, and the gap between a competent DIY attempt and a professionally installed floor is wider than with almost any other pattern.
We have seen rooms where homeowners followed every step correctly but still ended up with pattern drift because their subfloor had a barely perceptible twist across the room. That kind of issue is almost impossible to detect without specialist equipment and experience. The herringbone pattern amplifies every imperfection in a way that a straight plank layout simply does not.
Professional installers use laser levels, specialist adhesives, and decades of pattern-reading experience to catch these problems before they become expensive. They also know how to read a room, understanding which direction to run the pattern to make a narrow hallway feel wider or a large open-plan space feel more intimate. These are the kinds of decisions that transform a floor from merely functional to genuinely beautiful. If you want floor transformation insights that go beyond the technical, the design choices matter just as much as the installation method.
Our honest view is this: if you have the patience, the tools, and a perfectly level subfloor, a confident DIYer can achieve a good herringbone result. But for most Glasgow homes, where subfloors are older, rooms are not perfectly square, and the investment in premium boards is significant, professional installation is simply the smarter choice.
Transform your home with expert herringbone flooring
Understanding the workflow is the first step. Knowing when to bring in expert hands is the second.

At Acland Wood Flooring, we specialise exclusively in wood floors, which means every member of our team understands the specific demands of herringbone flooring in Glasgow homes. Whether you want to follow our detailed herringbone install guide yourself or prefer to hand the project to professionals who do this every day, we are here to help. Browse our full range of premium wood floor supply and install options, and get in touch to discuss your project with someone who genuinely knows wood flooring inside out.
Frequently asked questions
What tools are essential for a herringbone floor installation?
A mitre saw, batten, and measuring tools are all crucial for accuracy and stability when laying herringbone floors, along with appropriate adhesives for your subfloor type.
How long does installing herringbone flooring take compared to other patterns?
It takes roughly 30% longer than a straight lay pattern due to the increased precision and alignment requirements at every stage.
Can I install herringbone floors myself or should I hire a professional?
DIY is possible with the right tools and a level subfloor, but professional installation is strongly recommended because herringbone amplifies alignment errors that would go unnoticed in simpler patterns.
What is pattern drift in herringbone flooring and how do I prevent it?
Pattern drift is when the herringbone layout gradually becomes misaligned across the room; regular checks as you lay each row, combined with a fixed batten starting point, are the most effective preventative measures.