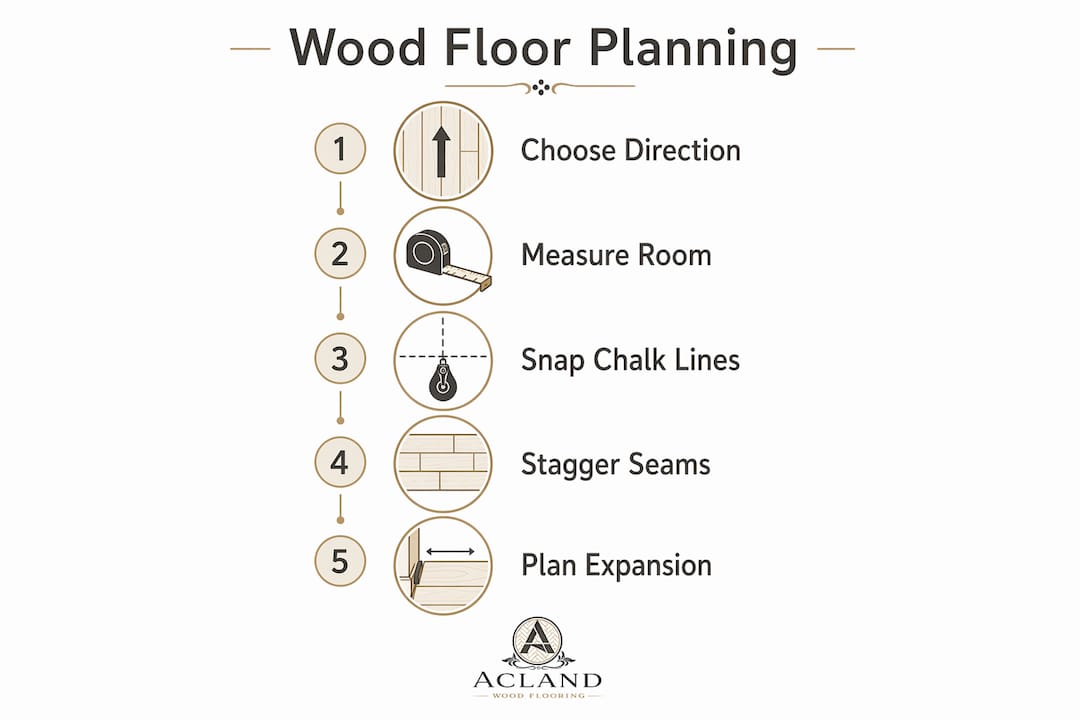
Planning a wood floor layout means deciding plank direction, calculating row widths with expansion gaps, and arranging staggered seams before a single board is fixed in place. Get these decisions right and the floor looks professional, holds its structure, and lasts for decades. Get them wrong and you face crooked rows, narrow slivers at the walls, and joints that line up in ways that weaken the floor. This guide walks you through each step, from choosing your reference wall to handling large or complex spaces, using the same standards professional installers follow.
How to plan wood floor layout: choosing plank direction
The direction your planks run shapes how the entire room feels, so this is the first decision to make. Run planks parallel to the longest, straightest wall or towards the main light source for the best visual result. Light travelling along the length of a plank creates a clean, elongated look. Light hitting planks side-on emphasises every joint and makes the floor feel busier.
Room shape matters too. In a rectangular room, running boards along the longest dimension makes the space feel larger. In a hallway, always run boards lengthwise along the hall. A square room gives you more freedom, so let the light source guide you.
- In open-plan spaces, choose a direction that works across all zones, not just one area.
- In L-shaped rooms, align planks with the longest leg of the L.
- Diagonal layouts add drama but increase waste by 10% to 15%, so factor that into your budget.
- If two rooms connect through a doorway, matching direction across both avoids a jarring visual break.
Pro Tip: Lay a few loose planks in your chosen direction before committing. Stand at the room entrance and assess the look in natural light. What you see from the doorway is what guests see every day.
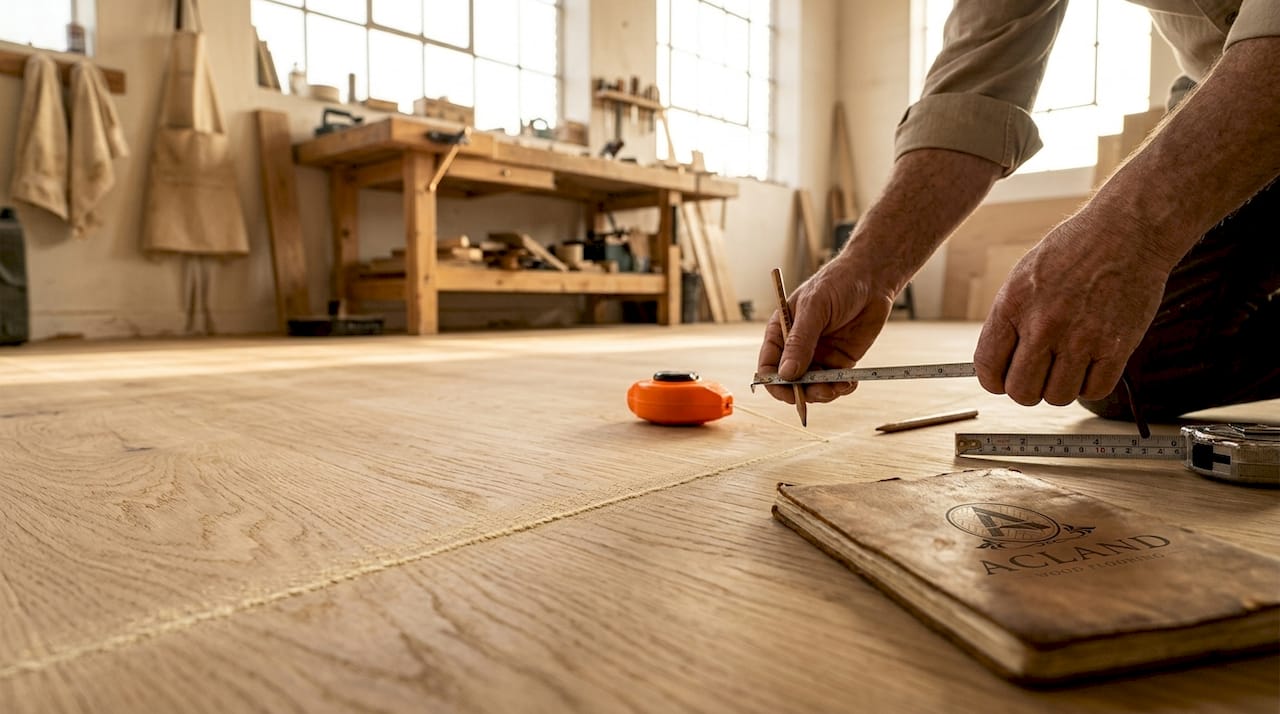
How do you measure and mark your layout lines?
Accurate measurement before you touch a nail gun is what separates a professional result from a frustrating one. Start by measuring the room width from the starting wall to the opposite wall. Divide that figure by the plank width to calculate how many rows you will need and how wide the final row will be.
If the last row is narrower than 2 inches, adjust the starting row so both the first and last rows share a similar width. A narrow sliver at the far wall looks unfinished and is structurally weak. Splitting the difference across both ends gives a balanced, intentional appearance.
Follow these steps to mark your layout lines correctly:
- Measure out from the starting wall and subtract the expansion gap requirement of at least half an inch from all vertical obstructions, including walls, door frames, and fixed cabinetry.
- Mark two points at that distance along the starting wall, then snap a chalk line between them to create your first reference line.
- Check the line is square to the room using the 3-4-5 triangle method: measure 3 feet along one wall, 4 feet along the adjacent wall, and confirm the diagonal is 5 feet.
- Place manufacturer-recommended spacers along the wall before laying the first row to hold the expansion gap consistently.
| Step | Action | Why it matters |
|---|---|---|
| Measure room width | Divide by plank width to count rows | Reveals final row width before you start |
| Adjust first row | Trim if last row would be under 2 inches | Prevents narrow, unstable slivers |
| Snap chalk line | Mark straight reference line from wall | Corrects for bowed or uneven walls |
| Set expansion spacers | Place along all vertical obstructions | Allows timber to move with humidity |
Pro Tip: Walls are rarely straight, even in new builds. Never use the wall itself as your guide. Snap a chalk line and trust the line, not the plaster.
How to stagger seams effectively within your wood floor layout
Staggering the end joints between rows is not just a visual choice. It is a structural one. End joints in adjacent rows must be offset by at least 6 inches (150 mm). For wider planks, 8 to 10 inches is the better target. When joints align or sit too close together, the floor loses rigidity at those points and can flex or creak underfoot.
Using offcut pieces from the end of one row as the starter piece for the next row is one of the most practical stagger techniques available. It maintains the random, natural look of real timber, reduces waste, and keeps the layout moving efficiently. The only rule is that the offcut must meet the minimum offset distance.
Here is how poor and proper staggering compare:
| Layout type | Joint offset | Structural result | Visual result |
|---|---|---|---|
| Poor staggering | Under 6 inches | Weak floor, flex points | Repetitive, unnatural pattern |
| Correct staggering | 6 to 10 inches | Strong, rigid floor | Random, natural timber look |
| Random length method | Varies, always 6+ inches | Best structural result | Most authentic appearance |
Before you glue or nail anything, dry-fit three or four rows across the room. This lets you spot any joints that are too close, adjust lengths, and see the overall pattern before it becomes permanent. It takes an extra hour but saves you from pulling up boards later.
- Never start three consecutive rows with the same length offcut. This creates a staircase pattern that looks manufactured.
- Avoid H-joints, where joints in rows one and three align directly. These are the weakest configuration.
- Mix plank lengths deliberately to keep the eye moving across the floor.
What else do you need to plan for large or complex projects?
When you move beyond a single rectangular room, the planning requirements grow. For diagonal or patterned layouts, order 10% to 15% extra material above your measured area to cover cut-offs and mistakes. For straightforward parallel layouts, 5% to 10% is sufficient. Underordering mid-project is a real risk, particularly with natural timber where batch colours can vary.
Moisture is the most common cause of floor failure in Scotland’s climate. Before installing over a concrete subfloor, test moisture levels using ASTM F2170 or F1869 methods. Excess moisture causes cupping, gapping, and adhesive failure. No amount of careful layout planning recovers a floor that has been laid on a wet slab.
For larger spaces, floors longer than 40 feet or wider than 25 feet require expansion breaks with transition strips, such as T-mouldings, to allow the floor to move with seasonal humidity changes. Plan where these breaks will fall before you start laying. Doorways are the natural location, but in very large open rooms you may need a break mid-floor.
Pro Tip: When planning transitions between different flooring types, such as wood meeting tile in a kitchen, account for the height difference. A reducer strip handles the level change cleanly and protects the wood edge from chipping.
Explore wood floor patterns like herringbone or chevron if you want a more complex layout. These styles require additional planning for the centre point of the room and significantly more precise cutting, so map them out on paper or a digital floor plan tool before ordering materials.
Key takeaways
A successful wood floor layout depends on three decisions made before installation begins: plank direction, accurate row measurement with correct expansion gaps, and properly staggered end joints throughout the floor.
| Point | Details |
|---|---|
| Choose direction first | Run planks parallel to the longest wall or main light source for the best visual result. |
| Measure and adjust row widths | Confirm the final row will be at least 2 inches wide before snapping your chalk line. |
| Stagger joints correctly | Keep end joints at least 6 inches apart in adjacent rows to maintain structural strength. |
| Plan for waste | Order 5% to 10% extra for simple layouts and up to 15% for diagonal or patterned designs. |
| Test moisture on concrete | Use ASTM-standard moisture tests before laying over any concrete subfloor. |
What I have learned from years of wood floor layout planning
The single mistake I see most often from DIYers is trusting the walls. People measure from the skirting board, assume it is straight, and lay their first row against it. By row ten, the floor is visibly skewed and there is no clean way to fix it without pulling everything up. A chalk line takes five minutes and it is the most important line you will draw all day.
The second lesson is patience with dry-fitting. Most people want to skip it. Every installer I respect does it without question. Laying out three or four rows loose before committing reveals problems with stagger, plank length distribution, and colour variation in the batch. You can sort all of that in twenty minutes rather than discovering it after the adhesive has cured.
For anyone planning a large-scale flooring project across multiple rooms or an open-plan space, draw the layout to scale on paper first. Mark where your expansion breaks will fall, where transitions meet other floor types, and where your first chalk line sits. The floor you plan on paper is the floor you get in reality.
— John
How Aclandwoodflooring can help you get it right
Planning a wood floor layout is the foundation of every successful installation, and Aclandwoodflooring has built its reputation in Glasgow on getting that foundation exactly right.

Whether you are tackling a single room or planning across an entire property, the team at Aclandwoodflooring provides expert guidance on layout methods, material selection, and installation standards. Their wood floor installation guide covers professional techniques in detail, and their layering methods guide explains the construction principles behind every layout decision. If you want a specialist to assess your space and recommend the right approach, contact Aclandwoodflooring directly for personalised advice tailored to your home and Scotland’s climate.
FAQ
Which direction should wood floor planks run?
Run planks parallel to the longest, straightest wall or towards the main light source. In hallways, always run boards lengthwise along the hall.
How much expansion gap do I need around the walls?
Maintain at least a half-inch expansion gap from all walls and fixed vertical obstructions. This gap is hidden later by skirting boards or trim.
How far apart should end joints be staggered?
End joints in adjacent rows must be offset by at least 6 inches. For wider planks, aim for 8 to 10 inches to maintain structural integrity.
How much extra material should I order?
Order 5% to 10% extra for straightforward parallel layouts. For diagonal or patterned designs, order 10% to 15% more to account for additional cut-offs.
Do I need to test moisture before laying wood floors on concrete?
Yes. Test using ASTM F2170 or F1869 methods before installing over any concrete subfloor. Excess moisture causes cupping, gapping, and adhesive failure.