
Plank flooring can completely transform a room, but fitting it poorly costs far more than the floor itself. Warped boards, squeaky planks, and ugly gaps are frustratingly common outcomes when installers skip critical steps. In Glasgow and Central Scotland, the challenge runs deeper still. Our damp, variable climate puts extra pressure on every stage of the process. Get it right, though, and you’ll have a floor that looks stunning and lasts decades. This guide walks you through every step, from gathering tools to final inspection, so you can achieve a truly professional result.
Key Takeaways
| Point | Details |
|---|---|
| Preparation is crucial | Testing and levelling your subfloor prevents future plank floor issues. |
| Adapt for climate | Humidity in Glasgow requires special acclimatisation and moisture checks for wood floors. |
| Professional methods matter | Precise cuts and expansion gaps ensure your floor stays beautiful and stable. |
| Aftercare extends life | Proper cleaning and prompt fault-fixing keep your new floor at its best. |
Gathering tools and materials
With your tools ready, the next step is to prime your space for perfect plank flooring. Before you lay a single board, assembling everything you need prevents costly interruptions midway through. Running out of underlay or realising you lack the right saw blade wastes time and risks mistakes.
| Tool or material | Purpose |
|---|---|
| Moisture metre | Tests subfloor and plank humidity levels |
| Pull bar and tapping block | Locks planks together without damage |
| Mitre or jigsaw | Accurate cuts around edges and obstacles |
| Tape measure and pencil | Marking out rows and cut lines |
| Floor adhesive | For glue-down installations |
| Damp-proof membrane (DPM) | Moisture barrier between subfloor and planks |
| Underlay | Sound insulation and cushioning |
| Spacers | Maintain consistent expansion gaps at walls |
| Knee pads | Protect joints during extended kneeling |
Beyond the basics, professional fitters often bring:
- Laser level for checking large floor areas quickly
- Oscillating multi-tool for undercutting door frames cleanly
- Self-levelling compound for correcting minor subfloor dips
- Chalk line for snapping straight reference lines across the room
- Rubber mallet for gentle persuasion without splitting boards
Pro Tip: Invest in a quality moisture metre before anything else. Skipping this single tool is one of the most common flooring mistakes to avoid and the leading cause of premature floor failure in Scotland. You should also level subfloors with compound and test for humidity before committing to any installation method.
Always wear knee pads, safety goggles when cutting, and dust masks when sanding or applying compounds. These aren’t optional extras. They protect you throughout a physically demanding job.
Choosing the best flooring for humidity conditions in your property also starts at this stage. The right material, chosen with climate in mind, makes everything else easier.

Preparing the subfloor and acclimatising planks
With your tools ready, the next step is to prime your space for perfect plank flooring. A clean, level, dry subfloor is non-negotiable. Even a 3mm dip across a metre can cause a click-lock floor to flex and eventually separate.
- Clear the room fully and sweep away all debris.
- Inspect the subfloor for protruding nails, screws, or raised edges and fix them.
- Use a long spirit level or straight edge to identify dips and high spots.
- Apply self-levelling compound to any area that deviates more than 2mm per metre.
- Once cured, test moisture levels with your metre. For concrete subfloors, relative humidity (RH) should sit below 75%. Timber subfloors need moisture content below 12%.
- Lay your damp-proof membrane where readings are borderline or where ground-floor concrete is involved.
- Stack planks flat in the room for at least 48 hours, ideally 72 hours, before fitting.
Important: Because subfloor RH must be tested rigorously in Central Scotland’s climate, never skip this step even if conditions feel dry. A single wet winter can raise moisture levels significantly and cause severe board movement.
Acclimatisation is especially important with engineered wood for Glasgow properties. Engineered boards are more dimensionally stable than solid wood, but they still need time to adjust to the room’s temperature and humidity before fitting begins. Stack them in their boxes, off the floor, away from radiators, and let them settle naturally.
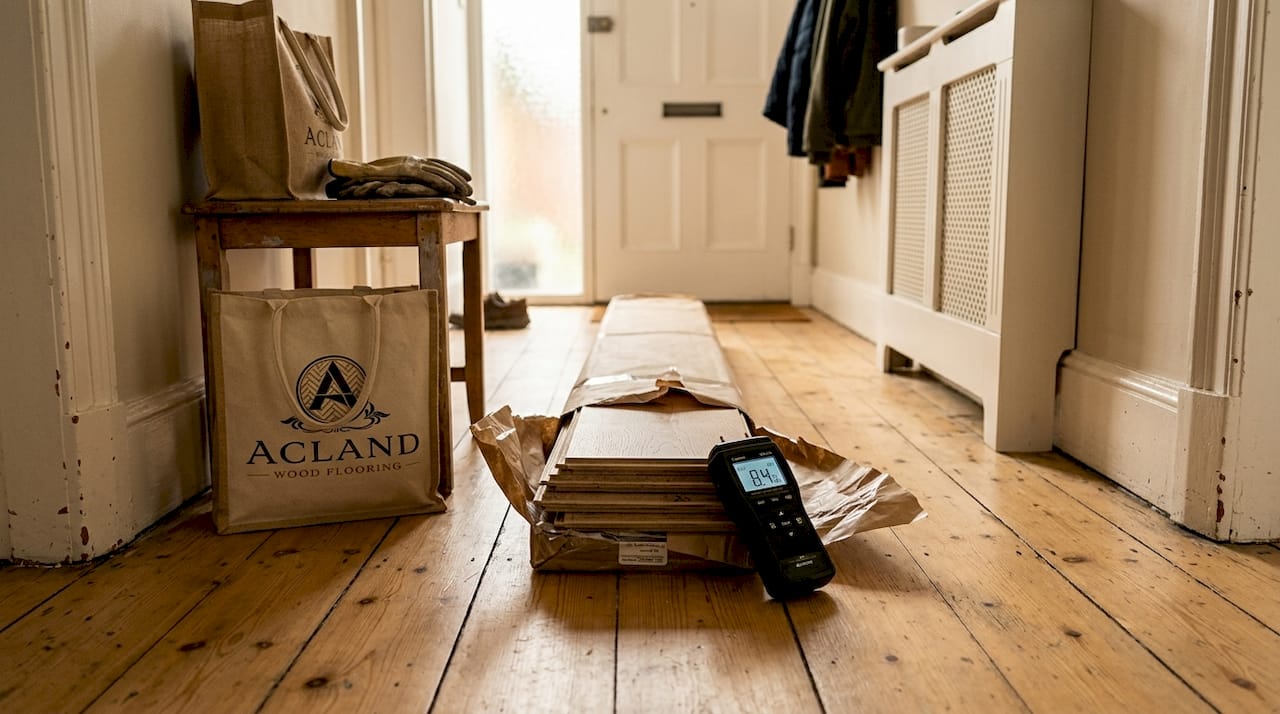
Pro Tip: Take moisture readings on three separate days rather than once. Glasgow’s weather shifts quickly, and a single reading can give a false sense of security. This approach aligns with how experienced fitters at Acland handle every professional wood floor supply and fitting project.
Step-by-step plank floor fitting
With preparation complete, you’re ready for hands-on installation. Here’s how to do it right.
- Snap a chalk line parallel to the longest, straightest wall to establish your starting row.
- Place spacers at every wall to maintain a 10mm to 15mm expansion gap around the perimeter.
- Lay the first row with the tongue facing the room, groove against the wall.
- Stagger end joints by at least 300mm between adjacent rows.
- Cut the final piece of each row to fit, saving the offcut to start the next row.
- Click or glue subsequent rows depending on your installation method.
- Work across the room, checking alignment every three or four rows with your tape measure.
| Feature | Click system | Glued installation |
|---|---|---|
| Speed | Faster to fit | Slower but more stable |
| Reversibility | Easier to lift and relay | Permanent bond |
| Best for | Upper floors, floating fits | Ground floors, underfloor heating |
| Skill level needed | Moderate | Higher |
For tricky areas,
drill oversized holes around pipes, use collars, and undercut doors to the plank height for a clean finish. Pipe holes should be at least 10mm wider than the pipe diameter to allow natural expansion. This prevents boards from cracking as the floor moves seasonally.
Pro Tip: Always leave expansion gaps even when fitting glued floors. Boards still move with temperature changes, and overlooking this step is a major plank-fitting error to avoid. For further reassurance on getting it right, expert flooring advice is always worth consulting before you start.
Finishing, checking, and aftercare essentials
Installation done, it’s time to check your work and learn how to protect your new floor.
Finishing is where a good job becomes a great one. Rushing this stage is what separates a professional result from a DIY look.
- Fit skirting boards or beading over the expansion gaps to conceal them neatly.
- Install door threshold bars wherever the floor meets a different surface.
- Add pipe collars around any radiator or heating pipes coming through the floor.
- Remove all spacers before fitting trims.
- Wipe boards clean with a lightly damp cloth to remove dust and adhesive residue.
- Inspect every row under raking light (torch held low and angled) to spot any raised edges or misaligned joints.
Pro Tip: Door bars and pipe collars are small details that make a significant visual difference. They’re the hallmark of a tidy, considered installation and they protect the most vulnerable points of your floor.
For ongoing care, avoid direct sunlight and heat sources near plank edges to maintain long-term stability. Use felt pads under furniture legs, clean spills immediately, and never steam-mop a wood floor. In Glasgow’s wetter months, keep indoor humidity stable using a dehumidifier if necessary. Understanding the wide plank value proposition also helps you make informed choices about board width and the aftercare they demand.
Our expert view on flawless plank flooring in Central Scotland
Having covered the full plank floor fitting process, here’s what years of experience in Central Scotland have shown us.
The most expensive repairs we see are never caused by bad materials. They’re caused by skipped steps. A fitter who rushes past moisture testing or cuts the acclimatisation period to a single day will charge less upfront and cost you far more within twelve months. Scotland’s climate is genuinely unforgiving to shortcuts.
We’ve seen floors fitted in summer look perfect at handover, then buckle spectacularly by February when heating systems work overtime. Patience at the preparation stage isn’t caution. It’s craftsmanship. Our real flooring projects reflect what happens when every stage gets the attention it deserves.
Enhance your home with expert plank floor support
If you want a truly professional, long-lasting finish or still have questions, expert support can make the difference.

At Acland Wood Flooring, we specialise exclusively in wood floors, which means every recommendation we make is grounded in deep, specific knowledge of the materials and Scotland’s conditions. Whether you need premium wood flooring supply and fit or guidance on choosing the best wood for Glasgow humidity, our team is here to help. Speak with us before starting your project and avoid the costly mistakes that catch so many homeowners out.
Frequently asked questions
How should I prepare my subfloor for plank flooring in Glasgow?
Test moisture levels and ensure the subfloor is level and dry before installing plank flooring, using a damp-proof membrane if needed. Level with compound and test RH before laying any boards, especially in ground-floor or older Glasgow properties.
What is the best way to cut planks around pipes and doors?
Drill oversized holes, use collars, undercut doors to plank height for a neat, professional finish. Pipe holes should exceed the pipe diameter by at least 10mm to allow for seasonal movement.
Why is acclimatisation important before fitting wood planks?
Allowing planks to acclimatise reduces expansion and contraction after fitting, especially in humid climates like Glasgow. Test subfloor RH rigorously during this period for the most reliable results.
How can I avoid gaps or buckling after installation?
Leave recommended expansion gaps at edges and avoid direct heat and sunlight near planks to maintain a stable floor long-term.