
Choosing the right wood floor layering methods for your home is not simply a matter of preference. The method you pick affects how long your floor lasts, how it feels underfoot, and whether you can realistically fit it yourself. Get it wrong and you could end up with a floor that buckles, squeaks, or looks crooked within a year. This guide breaks down the three primary installation methods available to homeowners, along with the critical details that separate a lasting result from a costly redo.
Key takeaways
| Point | Details |
|---|---|
| Three core methods exist | Nail-down, glue-down, and floating each suit different subfloors and skill levels. |
| Moisture is the biggest risk | Over 70% of hardwood failures relate to moisture, so testing before installation is non-negotiable. |
| Expansion gaps prevent buckling | A minimum half-inch gap around the perimeter stops costly post-installation repairs. |
| Acclimation is a process, not a timeline | Use a moisture meter to confirm planks and subfloor are within 2% moisture content of each other. |
| Glue-down suits concrete and wide planks | It delivers the flattest, quietest, most stable result when subfloor prep is thorough. |
1. Nail-down: the classic method for solid hardwood
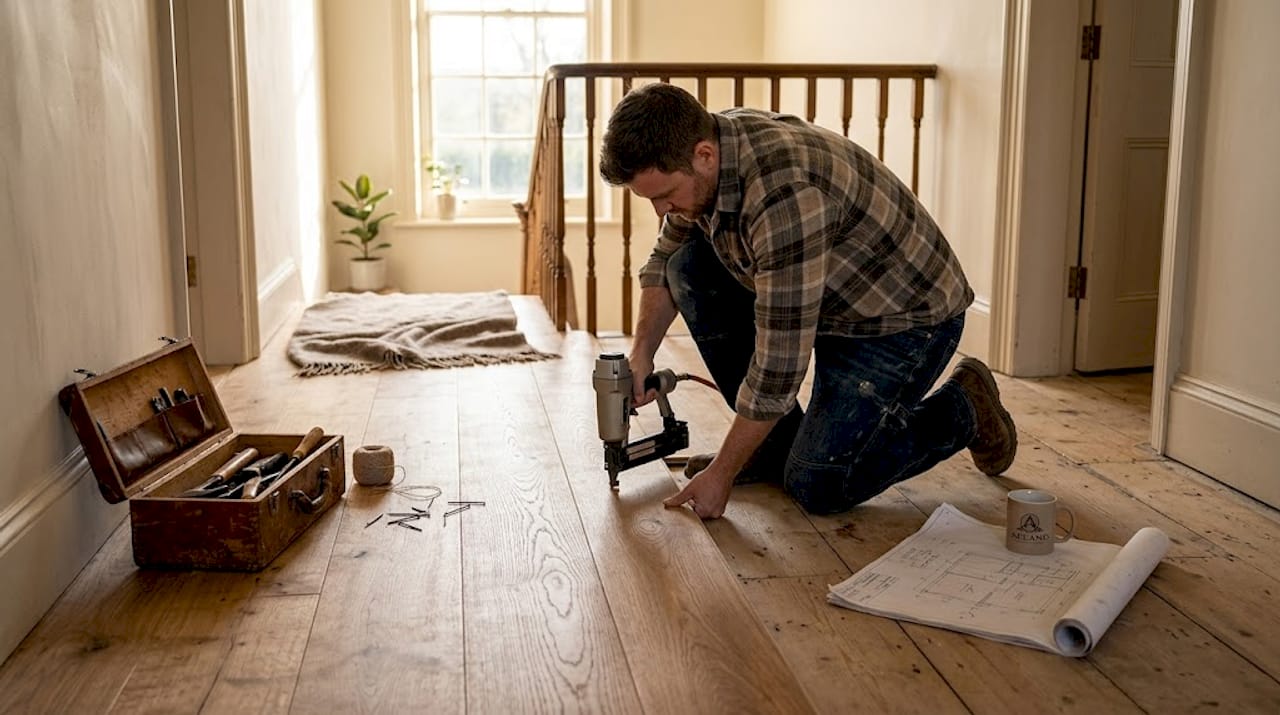
Nail-down is the traditional approach to layering hardwood floors and remains the preferred choice for solid wood species like oak, ash, and walnut. The boards are secured directly to a plywood or timber subfloor using nails or staples fired through a pneumatic flooring nailer.
What you need to know before starting:
- Your subfloor must be timber-based and at least 18mm thick to hold the fasteners properly
- The subfloor must be level, dry, and structurally sound before a single board goes down
- You cannot use this method over concrete without first laying a timber subfloor over the top
- Pneumatic nail guns are widely available to hire, but the technique takes practice
The result is a floor that feels solid and permanent. There is very little flex underfoot, which most homeowners prefer. Nail-down is also a method that professional installers have refined over decades, meaning a skilled fitter will produce a floor built to last a generation.
Pro Tip: For planks wider than 5 inches, pair your nailing with a bead of adhesive underneath. Wide planks with glue-assist significantly reduce movement and squeaking compared to nailing alone.
The main limitation is subfloor dependency. If you have a concrete ground floor (common in many Scottish homes built after the 1970s), you either need to build up a timber subfloor first or switch to a different method entirely.
2. Glue-down: the go-to for concrete subfloors
Glue-down is the method most commonly used with engineered wood floor methods on concrete subfloors. Instead of fasteners, the boards are bonded directly to the subfloor using a flexible urethane or acrylic adhesive.
Key requirements before you glue:
- Concrete subfloor must read below 75% relative humidity before adhesive is applied
- The surface must be flat to within 3mm over a 1.8 metre span
- Wide planks (5 inches or wider) benefit most from this method
- Allow full adhesive cure time before foot traffic
The results speak for themselves. Glue-down installation improves sound transmission and heat transfer when used with underfloor heating, making it the preferred choice for flats, modern new-builds, and any room with a concrete slab. The floor sits flat, feels solid, and produces none of the hollow sound you sometimes get with floating boards.
The trade-off is complexity. Subfloor preparation takes time. Moisture testing is not optional. And if you apply adhesive to a damp slab, the floor will fail regardless of how carefully you laid each board.
Pro Tip: Hire a calibrated hygrometer to test concrete moisture over 72 hours before committing to glue-down. One weekend of testing can save you the cost of replacing an entire floor.
This method is achievable for a confident DIYer who respects the prep work, but it is the one most worth leaving to a professional if you have any doubt about the subfloor condition.
3. Floating: the fastest, most DIY-friendly option
Floating floors do not attach to the subfloor at all. The boards lock together at their edges using a click or tongue-and-groove system, and the entire floor moves as a single unit. This approach suits engineered wood floor methods best, though some solid engineered products also support it.
Where floating works well:
- Over existing floors, concrete, or plywood without major prep
- In rental properties where future removal or repair is likely
- In basements where slight moisture fluctuation is expected
- For homeowners who want to complete the job in a weekend
Floating floors forgive minor subfloor imperfections better than the other methods and are undeniably the fastest to install. For renovations where you need to keep disruption low, this is hard to beat.
The honest downside is feel. Walk across a well-laid glued or nailed floor, then walk across a floating floor, and most people notice the difference immediately. There is a slight give underfoot, and in quieter rooms you may hear a hollow tap when you walk. These are not defects. They are simply the character of the method.
For rooms over 40 square metres, expansion joints or transition strips are required to manage floor movement. Skip these and you risk the floor peaking or developing gaps as it expands and contracts through the seasons.
4. Acclimation, moisture control, and expansion gaps
No matter which wood floor layering method you choose, three factors will determine whether your floor succeeds or fails over time.
- Acclimate properly. Acclimation is not “leave the boxes in the room for 48 hours.” It is a process of moisture equilibrium. Use a pinless moisture meter to confirm the plank moisture content is within 2% of the subfloor reading. This could take days or it could take weeks depending on your conditions.
- Control subfloor moisture. Wood subfloors should read below 12% moisture content. Concrete must sit below 75% relative humidity. Moisture-related floor failure accounts for the majority of all callbacks and warranty claims in the industry.
- Leave expansion gaps. At least a half-inch gap around every edge, door frame, and fixed object is required. Ignoring expansion gaps is, according to most experienced fitters, the single most common and expensive DIY error made during wood floor installation.
Pro Tip: Walls are rarely perfectly straight. Snap a chalk line parallel to your longest wall before laying the first board. This gives you a reliable reference and prevents your floor from looking crooked once the skirting goes back on.
5. Method comparison at a glance
| Method | Best subfloor | Skill level | Underfoot feel | DIY suitability |
|---|---|---|---|---|
| Nail-down | Timber/plywood | Intermediate to advanced | Solid, firm | Possible with hired tools |
| Glue-down | Concrete, plywood | Advanced | Flat, very solid, quiet | Better left to professionals |
| Floating | Any (flat and dry) | Beginner to intermediate | Slight give, hollow tap | Excellent for DIY |
The table above reflects broad generalisations. Your specific subfloor condition, room size, and choice of wood species will all influence which method actually suits your project best.
My honest take on which method to choose
I’ve seen homeowners dismiss floating floors as the budget option, and that thinking has cost some of them money. When you are working over an existing tiled floor or laying into a basement where future access matters, floating is not second-best. It is the right tool for that job.
What I’ve learned from watching floors fail is that the method itself is rarely the problem. The problem is almost always the prep. A glue-down floor laid over a damp slab will fail. A nail-down floor installed without proper acclimation will cup. A floating floor installed without expansion gaps will buckle. The wood flooring errors I see most often have nothing to do with technique and everything to do with skipped steps.
My advice: spend as much time preparing your subfloor as you spend laying your floor. The result will reflect that investment every day for the next twenty years.
— John
Get the right result with Aclandwoodflooring

Choosing between nail-down, glue-down, and floating is much easier when you have someone experienced looking at your actual subfloor and room conditions. Aclandwoodflooring works with homeowners across Glasgow to assess subfloor suitability, carry out moisture testing, and recommend the method that delivers the best long-term result for your space.
Whether you are considering solid wood flooring for a traditional feel or exploring engineered options for a room with underfloor heating, the team at Aclandwoodflooring can guide you from product selection through to professional installation. Take a look at the full installation guide to get started, or get in touch directly for advice tailored to your home.
FAQ
Which wood floor layering method is best for concrete?
Glue-down is the most reliable method for concrete subfloors, provided the slab passes moisture testing. Floating is also a practical option if the concrete is level and dry.
How long does acclimation take before installation?
Acclimation time varies. The only reliable measure is confirming that plank and subfloor moisture content are within 2% of each other using a moisture meter, which can take days or several weeks.
Can you float solid hardwood floors?
Most solid hardwood is not suited to floating due to its thickness and movement characteristics. Floating is generally recommended for engineered wood, which is dimensionally more stable.
What happens if you skip the expansion gap?
Without a minimum half-inch expansion gap, wood floors buckle as they expand in warmer or more humid conditions. Repairing a buckled floor typically means relaying a significant portion of it.
Is glue-down better than nail-down for wide planks?
For planks 5 inches wide or wider, a glue-assist approach (applying adhesive before nailing) delivers noticeably better stability and reduces squeaking compared to nailing alone.